by Arturo TP | Jun 6, 2024 | Paving
Paving slabs, an essential component for landscaping and construction, have seen a significant price increase in San Jose, California. If you’re a homeowner or contractor, you’ve likely noticed the rising costs and wondered what’s behind this trend. Let’s explore the key factors contributing to the high prices of paving slabs in this region.
High Demand for Construction and Renovation
San Jose, the heart of Silicon Valley, is experiencing a construction boom. With a thriving tech industry and an influx of new residents, there’s a substantial demand for new housing, commercial spaces, and infrastructure improvements. Paving slabs are a staple in these projects, driving up the demand and, consequently, the prices.
Limited Local Supply
The production of paving slabs is limited within the region. Many of the materials have to be transported from other areas, adding transportation costs to the final price. The high cost of real estate in San Jose also means that local manufacturing facilities face higher operational costs, which are passed on to consumers.
Transportation and Logistics Costs
San Jose’s location in Northern California means that many construction materials, including paving slabs, have to be transported over long distances. The cost of fuel, labor, and logistics significantly impacts the price of these heavy and bulky items. Additionally, the stringent regulations and high standards for transportation in California further add to the costs.
Labor Costs
The cost of labor in San Jose is among the highest in the country. Skilled labor for manufacturing, transporting, and installing paving slabs demands premium wages. The high cost of living in the area necessitates higher salaries, which directly affects the cost of construction materials, including paving slabs.
Quality and Aesthetics
In a city known for its affluence and high standards, there is a strong preference for high-quality and aesthetically pleasing materials. Paving slabs come in various designs, finishes, and materials, and those that meet the premium standards demanded by San Jose’s residents and businesses naturally come at a higher price. The emphasis on sustainability and environmentally friendly materials also adds to the cost, as these options typically require more expensive manufacturing processes.
Regulations and Permitting
California is known for its strict building codes and environmental regulations. Manufacturers and suppliers of paving slabs must comply with these regulations, which often involve additional costs for testing, certification, and ensuring environmental standards are met. These regulatory costs are factored into the price of the slabs.
Market Dynamics and Competition
The competitive landscape in San Jose’s construction market also plays a role. With many projects underway and limited suppliers, the basic economic principle of supply and demand comes into play. When demand outstrips supply, prices naturally rise. Additionally, the presence of large-scale projects funded by tech giants can skew the market, driving prices higher as suppliers prioritize larger, more lucrative contracts.
Conclusion
The high cost of paving slabs in San Jose is a multifaceted issue influenced by local demand, supply chain logistics, labor costs, regulatory factors, and market dynamics. For homeowners and businesses, understanding these factors can help in making informed decisions and exploring potential cost-saving measures, such as sourcing alternative materials, considering recycled options, or planning projects during off-peak seasons.
While the prices may seem steep, they reflect the economic realities of a booming region like San Jose, where the intersection of high demand and premium standards sets the stage for a vibrant, albeit costly, construction market.
by Arturo TP | May 29, 2024 | Asphalt
Step 1: Planning and Preparation
- Check Local Regulations: Review local regulations and obtain any necessary permits for asphalt paving in San Jose.
- Measure and Plan: Measure the area to be paved and calculate the amount of asphalt needed. Consider factors like slope, drainage, and existing pavement condition.
- Prepare the Site: Clear the area of debris, vegetation, and any existing pavement. Grade the site to ensure proper drainage away from buildings and structures.
Step 2: Base Preparation
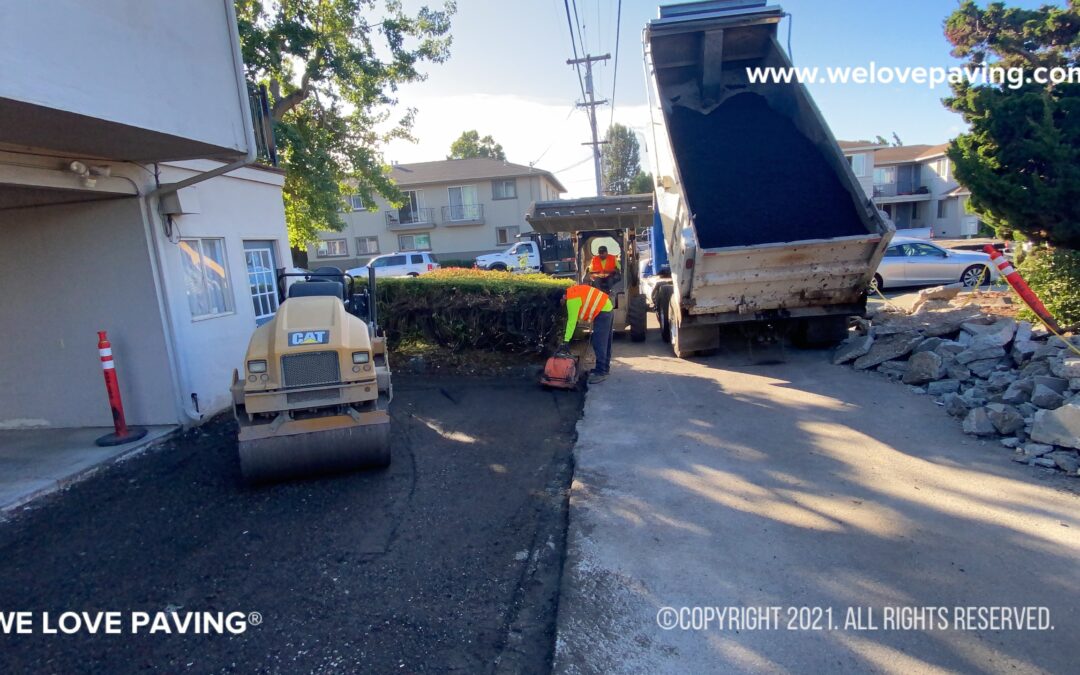
- Subgrade Preparation: Compact the soil to create a stable base. Use heavy machinery like rollers or compactors to achieve the desired compaction.
- Subbase Installation: Lay a layer of aggregate subbase material (usually gravel or crushed stone) and compact it thoroughly to create a stable foundation for the asphalt.
Step 3: Asphalt Mix
- Select Asphalt Type: Choose the appropriate type of asphalt mix for your project. In San Jose, California, common types include hot mix asphalt (HMA) or warm mix asphalt (WMA).
- Transport and Temperature Control: Transport the asphalt mix to the site and maintain it at the proper temperature to ensure workability and compaction.
Step 4: Asphalt Placement
- Surface Preparation: Apply a tack coat to the prepared base to promote adhesion between the asphalt layers.
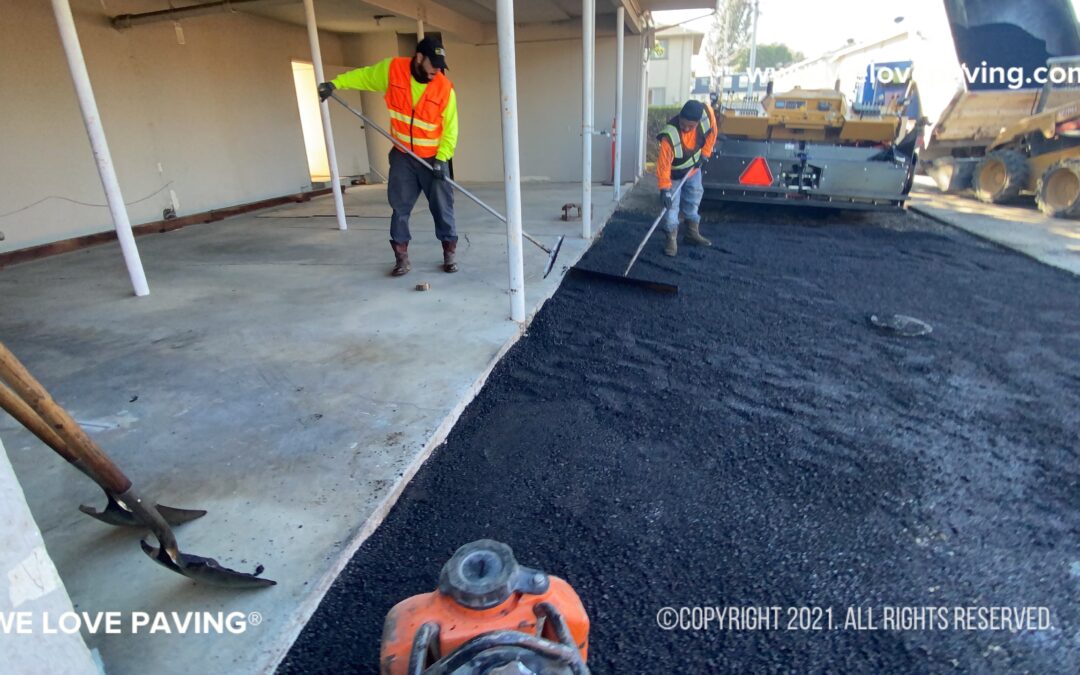
- Asphalt Installation: Use a paving machine to lay the asphalt mix evenly across the prepared surface. Compact the asphalt immediately after placement using a roller to achieve the desired density and smoothness.
- Edge Compaction: Pay special attention to compacting the edges and joints to ensure a seamless transition and prevent water infiltration.
Step 5: Finishing Touches
- Surface Smoothing: Use a finish roller or mechanical screed to achieve the desired smoothness and compaction of the asphalt surface.
- Curing: Allow the asphalt to cure properly according to manufacturer recommendations. This typically involves keeping traffic off the surface for a specified period.
- Striping and Marking: Once the asphalt has cured, apply pavement markings, striping, and any necessary signage according to local regulations and requirements.
Step 6: Maintenance
- Regular Inspections: Periodically inspect the asphalt surface for signs of wear, cracking, or potholes.
- Sealcoating: Apply a sealcoat to protect the asphalt surface and extend its lifespan. In San Jose’s climate, where UV exposure and temperature fluctuations can accelerate asphalt deterioration, regular sealcoating is especially important.
- Repairing Damage: Promptly repair any cracks or damage to prevent water infiltration and further deterioration.
By following these steps and considering the specific climate and regulations in San Jose, California, you can successfully lay asphalt for various projects, ranging from driveways and parking lots to roads and highways. Always ensure safety measures are in place, and consider hiring a professional asphalt contractor for large or complex projects.
by Arturo TP | May 22, 2024 | Paving
Pavers are a fantastic choice for creating beautiful and durable pathways, patios, and driveways. However, one of the key challenges in paver installation is ensuring that they are perfectly level. Uneven pavers not only look unsightly but can also pose a tripping hazard and cause drainage issues. In this guide, we’ll explore the step-by-step process of how to level pavers perfectly for a professional-looking finish that will stand the test of time.
Planning and Preparation
Before you start laying your pavers, proper planning and preparation are essential. Begin by determining the layout of your project area and marking it with stakes and string. Take accurate measurements and calculate the quantity of pavers and base materials you’ll need.
Excavation and Grading
Once you have your layout planned, it’s time to prepare the ground for the pavers. Excavate the area to the desired depth, taking into account the thickness of the pavers plus the base and bedding materials. Use a shovel, rake, and a level to ensure that the ground is evenly graded and compacted.
Base Material Installation
Next, add a layer of base material such as crushed stone or gravel to the excavated area. This base layer provides stability and drainage for the pavers. Spread the base material evenly and use a plate compactor to compact it firmly. Check the level of the base material with a straight edge and adjust as needed to achieve a uniform thickness.
Bedding Sand Application
Once the base material is in place, it’s time to add a layer of bedding sand. Spread a thin, even layer of coarse sand over the compacted base material. Use a screed board or straight edge to smooth and level the sand, ensuring consistent thickness throughout the project area.
Setting the Pavers
With the bedding sand prepared, you can now begin laying the pavers according to your chosen pattern. Start at one corner and work your way across the area, placing each paver tightly against its neighbor. Use a rubber mallet to gently tap the pavers into place, ensuring they are level with each other and the surrounding surface.
Checking for Level
As you lay each paver, use a level to check for both horizontal and vertical alignment. Adjust the position of the pavers as needed to ensure they are perfectly level in all directions. Pay close attention to the edges and corners, as these areas are prone to unevenness.
Adding Edge Restraints
To keep the pavers in place and prevent shifting over time, install edge restraints along the perimeter of the project area. This can be done using materials such as plastic or metal edging, concrete curbing, or even sturdy wooden stakes. Secure the edge restraints firmly in place using spikes or screws.
Final Compaction and Sanding
Once all the pavers are in place and properly leveled, use a plate compactor to gently compact the surface. This helps to settle the pavers into the bedding sand and creates a more stable finished surface. After compacting, fill any gaps between the pavers with additional sand and sweep it into the joints using a broom.
Finishing Touches
With the pavers in place and the joints filled, take a final look at your project to ensure everything is level and aligned correctly. Make any necessary adjustments before giving the entire surface a thorough cleaning to remove any excess sand or debris. Step back and admire your handiwork – you’ve successfully leveled your pavers to perfection!
Conclusion
Leveling pavers perfectly is a crucial step in creating a professional-looking and long-lasting outdoor space. By following the steps outlined in this guide, you can achieve a smooth and even surface that enhances the beauty and functionality of your landscape. Whether you’re installing a new patio, pathway, or driveway, proper leveling techniques will ensure that your pavers remain stable and attractive for years to come.
by Arturo TP | May 16, 2024 | Asphalt
Paving a driveway is a significant investment that can enhance the curb appeal, functionality, and value of your property. However, rushing into the paving process without proper preparation can lead to costly mistakes and premature pavement failure. One common question that homeowners face is how long their driveway should sit before paving. In this comprehensive guide, we’ll explore the factors that influence this decision and provide valuable insights to help you plan your driveway paving project effectively.
Site Preparation
Before paving can begin, it’s essential to ensure that the site is properly prepared. This includes clearing the area of any vegetation, debris, or existing pavement. Additionally, the subgrade – the natural soil or aggregate layer beneath the pavement – should be inspected and, if necessary, graded and compacted to provide a stable foundation for the new driveway. Depending on the condition of the site and the extent of the preparation required, this process can take anywhere from a few days to several weeks.
Weather Conditions
Weather conditions play a significant role in determining how long a driveway should sit before paving. Ideally, paving should be done during dry, mild weather to ensure optimal conditions for the installation and curing of the asphalt. Wet or rainy weather can delay the paving process and compromise the quality of the finished pavement. Additionally, extreme temperatures – both hot and cold – can affect the workability and performance of the asphalt mix, necessitating adjustments to the paving schedule.
Subgrade Settlement
After the site preparation is complete, it’s important to allow time for the subgrade to settle properly before paving. This is especially crucial if significant grading or excavation work was performed, as it can cause the soil to shift and settle over time. Allowing the subgrade to settle ensures a more uniform and stable foundation for the pavement, reducing the risk of settlement and cracking in the future. Depending on the soil conditions and the extent of the excavation, subgrade settlement can take anywhere from a few weeks to several months.
Soil Moisture Content
The moisture content of the soil also influences how long a driveway should sit before paving. Excessively wet or saturated soil can lead to poor compaction and stability, resulting in uneven settling and structural issues with the pavement. Conversely, overly dry soil can be difficult to work with and may require additional watering to achieve the desired compaction. By allowing the soil to reach an optimal moisture content before paving, you can ensure better performance and longevity of the driveway.
Permitting and Approval Process
Depending on your location and local regulations, you may need to obtain permits or approvals before paving your driveway. This process can vary in length depending on the complexity of the project and the requirements of the permitting authority. It’s essential to factor in the time needed to secure any necessary permits and approvals when planning your paving project to avoid delays and ensure compliance with local regulations.
Contractor Scheduling
Once all the necessary preparations are complete, you’ll need to coordinate with a reputable paving contractor to schedule the actual paving work. Keep in mind that paving contractors may have busy schedules, especially during peak paving seasons, so it’s essential to book their services well in advance. Additionally, the duration of the paving project will depend on factors such as the size of the driveway, the complexity of the design, and the availability of equipment and manpower. Be sure to discuss your timeline and scheduling requirements with your contractor to ensure a smooth and timely completion of the project.
Conclusion
Paving a driveway is a significant undertaking that requires careful planning and preparation. By considering factors such as site preparation, weather conditions, subgrade settlement, soil moisture content, permitting and approval processes, and contractor scheduling, you can determine how long your driveway should sit before paving. Taking the time to plan your paving project properly will help ensure the success and longevity of your new driveway, providing years of reliable service and enhancing the overall aesthetics and value of your property. So whether you’re planning to pave a new driveway or rehabilitate an existing one, remember that timing is key, and patience pays off in the long run.
by Arturo TP | Apr 23, 2024 | Asphalt, Paving
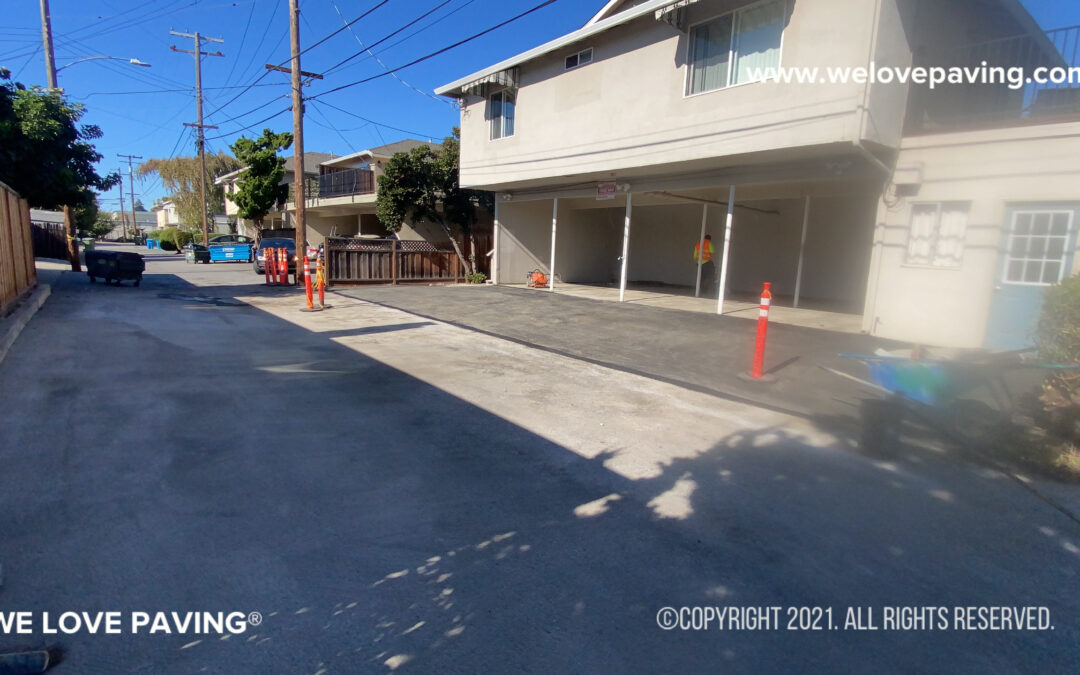
In the heart of Silicon Valley, where innovation and modern living converge, every detail of your home matters. From the exterior aesthetics to the functionality of the driveway, homeowners in San Jose, California, understand the importance of making a lasting impression. One often overlooked yet vital aspect of a home’s exterior is the driveway. It’s not merely a pathway to your garage; it’s a statement piece that sets the tone for your property’s overall appeal.
Why Asphalt Paving Matters
Imagine arriving home after a long day’s work to be greeted by a cracked, uneven driveway. Not the most welcoming sight, is it? This scenario highlights the significance of investing in quality asphalt paving. Here’s why it matters:
Curb Appeal
A beautifully paved driveway instantly enhances the visual appeal of your home. Whether you’re planning to sell or simply want to impress guests, a well-maintained driveway can significantly boost your property’s curb appeal.
Durability
San Jose’s diverse climate, from scorching summers to occasional rainfall, can take a toll on traditional concrete driveways. Asphalt paving, however, is renowned for its durability and ability to withstand fluctuating weather conditions without cracking or deteriorating.
Smooth Driving Experience
Ever experienced the jarring sensation of driving over a pothole-ridden driveway? With asphalt paving, you can bid farewell to such discomfort. Its smooth surface provides a seamless driving experience, ensuring convenience and safety for you and your vehicles.
Cost-Effectiveness
Compared to other paving options, asphalt is a cost-effective solution that offers excellent value for money. Its lower initial installation costs, coupled with minimal maintenance requirements, make it an attractive choice for homeowners seeking both quality and affordability.
The Importance of Professional Installation
While asphalt paving offers numerous benefits, achieving optimal results requires professional expertise. Entrusting the installation process to experienced contractors ensures precision, longevity, and adherence to local regulations. Moreover, reputable paving companies use high-quality materials and employ advanced techniques to deliver superior results that withstand the test of time.
Conclusion
Your driveway serves as the gateway to your home, making it an integral part of your property’s overall appeal. By investing in quality asphalt paving, homeowners in San Jose can elevate the aesthetics, functionality, and value of their residences. Whether you’re aiming to impress visitors or simply enhance your everyday living experience, a beautifully paved driveway is a worthwhile investment that pays dividends for years to come.
Ready to Transform Your Driveway? At San Jose Asphalt, we specialize in delivering premium asphalt paving solutions tailored to your specific needs. Contact us today to schedule a consultation and take the first step towards enhancing the beauty and functionality of your home.


